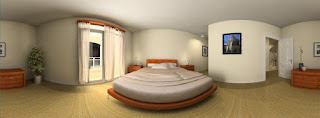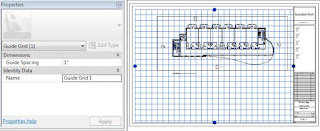
Guide Grids are new in 2011. They are designed to help in laying out of views on sheets. This is useful when tryign to line up floor plans on different sheets.
From Autodesk help "You can add guide grids to sheets to align views so that they appear in the same location from sheet to sheet. You can display the same guide grid in different sheet views. Guide grids can be shared between sheets. When new guide grids are created, they become available in the instance properties of sheets and can be applied to sheets. It is recommended to create only a few guide grids and then apply them to sheets. When you change the guide grid's properties/extents in one sheet, all the sheets which use that grid are updated accordingly."
Thoughts on Autodesk software... Revit, 3ds Max, AutoCAD, AutoCAD Architecture, Navisworks and the architecture industry.
Thursday, September 30, 2010
Wednesday, September 29, 2010
Revit Server - Worksets
I wanted to share with you some new info I found out about “Revit-Server” This is something new that is coming out this week in the new web-update for the product. Also what is in this web-build update is an Energy Analysis component…
Revit Server is designed to help the workflow of distributed teams. And the Energy Analysis tool is bringing integrated energy analysis to Revit modeling. Making it possible to calculate massing to determine the best sustainable option.
Link to article: http://www.aecbytes.com/buildingthefuture/2010/RevitServer_CEA.html
Tuesday, September 28, 2010
AutoCAD - different approach
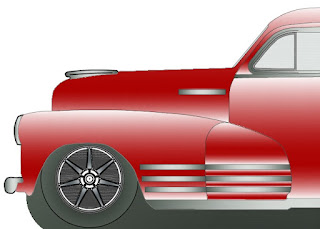
AutoCAD is the base program that Autodesk wrote from scratch back in the early 80's. It is general purpose, meaning it can be used across several industries. That does not mean it is "general" in its capabilites. One of those unique approaches is drawing up colored elevations for products or equipment. The example to the left is one example of using gradient coloring in AutoCAD. AutoCAD now-a-days has industry specific tools for the different "flavors" of AutoCAD. See which one works best for you: http://usa.autodesk.com/adsk/servlet/pc/index?id=15408167&siteID=123112
Monday, September 27, 2010
Raster Design
I had the opportunity to play around with Raster Design tover the weekend. It is a great to for saving time for converting scanned images into Vector based linework. Here is what Autodesk says about it "Make the most of rasterized scanned drawings, maps, aerial photos, satellite imagery, and digital elevation models. With powerful raster editing and raster-to-vector conversion tools, AutoCAD® Raster Design software helps you to easily clean up, edit, enhance, and maintain scanned drawings and plans in a familiar AutoCAD® environment for use in AutoCAD®"
Find out more by follwong this link:
http://usa.autodesk.com/adsk/servlet/pc/index?id=2600114&siteID=123112
Friday, September 24, 2010
3ds Max - mental ray Proxies
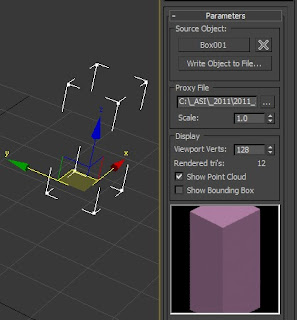
Need a stand in for your objects? This can help save time for rendering and when working in a scene file. Whats is it? mentalray Proxies in 3ds Max. They are a placeholders that are only loaded into memory and are processed per bucket during rendering. Files that use to lock up or freeze should now render quickly!
Go to the Create Panel , select "mental ray" in the Primitives drop down. Pick the "mr Proxy" button and place a box in the scene. Go to "Modify" panel and pick the "none" butto nto select the source object inthe scene. Then pick the "Write Object to File..." button to save the data of the object for rendering time. Atthis point everything is in place. Now you can copy, clone, or array the Proxy in your scene. You will see several boxes, but when you render they will all be nice rendered copies of the source object.
Wednesday, September 22, 2010
3ds Max - Ignore Backfacing
Here is something for increasing your rendering time. Ignore Backfacing. From the Autodesk 3ds Max Help menu "When on, selection of sub-objects affects only those facing you. When off (the default), you can select any sub-object(s) under the mouse cursor, regardless of their visibility or facing. If there are more than one sub-object under the cursor, repeated clicking cycles through them. Likewise, with Ignore Backfacing off, region selection includes all sub-objects, regardless of the direction they face."
Tuesday, September 21, 2010
3ds Max
Couple of quick tips from todays class that I was teaching...
3d model rotate - hold down the Ctrl key and wheel mouse to spin the model.
Cloning - Move tool, hold down Shift. This will duplicate the object, but giving yo uthe option of Copy, Instance or Reference. Instance vs. Reference... Instance you can change any of the object copied and it updates all of them. Reference, you need to change the original, to update the oters.
Save Copy - This saves your scene and adds a number sequence to the end of the file name.
Monday, September 20, 2010
Autodesk - Alias
Autodesk Alias is a powerful creative modeling tool for the manufacturing industry.
Quote from Autodesk Alias website "Purpose-built for industrial designers and creative professionals, digital modelers/sculptors, and automotive/transportation designers, Autodesk® Alias® industrial design software products—Autodesk® Alias® Design, Autodesk® Alias® Surface, and Autodesk® Alias® Automotive software—provide a complete set of sketching, modeling, and 3D product visualization tools for the conceptual design process. Data integration and exchange with Autodesk® Inventor® software enables industrial design data to be incorporated into the digital prototype."
Find out more about Autodesk Alias at: http://usa.autodesk.com/adsk/servlet/pc/index?id=14437167&siteID=123112
Friday, September 17, 2010
AIA NC Design Conference
The AIA NC 2010 Design Conference in Asheville, NC
Quote from AIA NC website about the conference "The 2010 Design Conference will cater to the diverse needs of our membership. Many chances for exploration and learning are available as a backdrop to a conference that offers nationally known speakers, book signings, an exhibition of new green products, more than 12 HSW/SD credits, and recovery networking." Here is a link to the website: http://aianc.org/cde.cfm?event=314279
Thursday, September 16, 2010
Revit - Extension - Compare Models
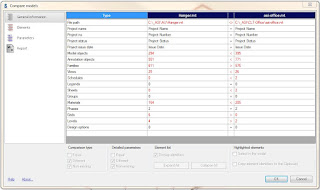
Looking into the Autodesk Subscription Add-in "Compare Models", we discover a powerful tool with the ability to detect changes, deletions and items that are equal.
From Help menu "Using the Compare models extension, you can compare 2 Revit models. The extension presents differences between successive versions of a structure project. When the extension starts, it recognizes the number of opened projects created in Revit. If more than 2 structure projects are opened, a dialog displays where you can select 2 projects to be compared."
Here is a link to learn more about Compare Models and other Extensions: http://www.extensions4revit.com/n/e4r/856/46
Wednesday, September 15, 2010
Revit - Wood Framing Walls
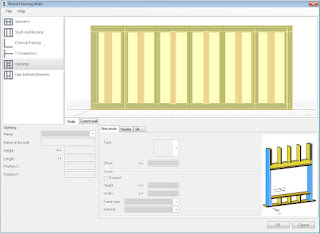
Revit Architecture and Structure has some very helpful routines in the Exensions Manager for Subscription software members. One of those routines is the "Wood Framing Walls". This routine is catagorized under "Model" in the Exensions Manager. This powerful little routine makes framing a wall quick and easy. There is a good Help menu incase you need a bit more information on how to lay out the framing. Be sure to download this and other great tools from the Autodesk Subscription site.
Here is a link: http://subscription.autodesk.com/sp/servlet/public/index?siteID=11564774&id=11607975
Tuesday, September 14, 2010
Moldflow
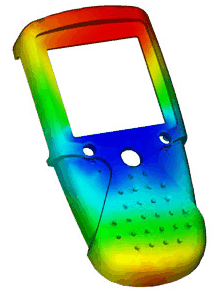
I was tasked Friday and over the weekend to help set up for an Autodesk Moldflow class. Moldflow is an injection plastic 3d modeling software purchased by Autodesk. It is a very cool looking software. From Autodesk's website "Autodesk® Moldflow® simulation software provides injection molding simulation tools for optimizing plastic parts, injection molds, and the injection molding process. Autodesk Moldflow guides designers, mold makers, and engineers through simulation setup and results interpretation to show how changes to wall thickness, gate location, material, and geometry affect manufacturability. Autodesk Moldflow offers geometry support ranging from thin-walled parts to thick and solid applications and helps you to experiment with “what-if” scenarios before finalizing a design."
If you like modeling in 3d, check out more at Autodesk's website: http://www.moldflow.com/stp/
Revit Structure
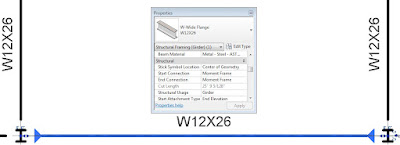
To create a brace frame in Revit Structure is best accomplished in a Framing elevation. Select the type of framing to add, like an HSS for metal building. But what do you do when yo uneed to show a Moment frame verces a Brace frame? After placing the brace framing, select the framing and go to Propoerties. Here yo ucan change the Connection Type to "Moment Frame". This will also change the graphical symbol in plan to show the filled in triangle, which is typical structural industry standard graphics.
Monday, September 13, 2010
Revit Structure - Grids
When creating grids in Revit Structure, be sure to use the "At Grids" option inder the "Multiple" column. This will save you a lot of time in placing the columns on gridlines. You can always go back and remove the extra columns you do not need.
Friday, September 10, 2010
Save down Revit file?
I was asked recently "If a drawing is done in Revit 2011 can it be opened and worked on in 2010?"
Officially... no. There isnt a save down or save earlier button in Revit. There never has been and probably never will be.
IFC to the rescue! You could export the project to IFC. Exporting to IFC is like breaking down the model into binary code. This allows other IFC-compliant applications to reassemble the code into its software application. So we can export from 2011 version, and import into 2010. This process may take a little time, but that is your only option.
Go to the Application Button (Big purple "R") dropdown, Export, IFC.
Link to Autodesk with further details: http://usa.autodesk.com/adsk/servlet/ps/dl/item?linkID=9243099&id=15649365&siteID=123112
Thursday, September 9, 2010
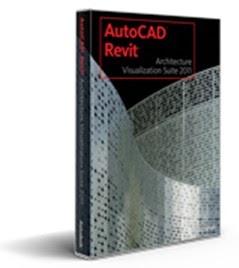
AutoCAD Revit Architecture Visualization Suite 2011
The Visualization Suite for AutoCAD/Revit Architecture includes: Revit Architecture, 3ds Max Design, Navisworks Simulate, AutoCAD Architecture and AutoCAD. All avaialable in 32 or 64 bit.
This is a great combo pack to get, and more than likely cheaper than buying them all seperately.
If you dont need 3ds MAx or Navisworks, then the Revit Architecture Suite is all you need. It comes with Revit Arch., AutoCAD Arch., and AutoCAD. Here is a link for more info:
Wednesday, September 8, 2010
FlexLM License server
Introduction
The purpose of this post is to explain how to update the FlexLM software to the latest version quickly, which at the time of this document is: 10.8. See screen grab below.
A word of caution
There are several ways to accomplish this task. This document addresses one of those methods. For further instructions or technical support contact Advanced Systems Inc.
Disclaimer
I hold no liability based of the actions of this post due to downtime, lost performance or other factors not allowing for a successfully completing the tasks here-in.
Preparation
Have other users who are using a network license get out of the software, or check out a license to keep them working and productive.
Copy the existing “?your company or release name?.lic” license file from the folder named “lic” or “License” depending on what was created. C:\Program Files\Autodesk Network License Manager\License to a temporary folder / safe place. We’ll need the license file later to merge with other products.
The data from the new lic. File needs to be copied and pasted into the existing lic. file.
The data from the new lic file should look like the below example:
SERVER Raiserver 002233e6674b
USE_SERVER
VENDOR adskflex port=2080
INCREMENT 51900AMECH_PP_2007_0F adskflex 1.000 permanent 3 \
VENDOR_STRING=commercial:permanent BORROW=4320 SUPERSEDE \
DUP_GROUP=UH ISSUED=19-Jan-2007 SN=123-22567483 SIGN="0341 \
9C3D D414 6A8D 8601 10DE A42D A847 43ED F1DB 60A0 08B7 D6F0 \
\
E672 8DE3 0F95 F1DE B0B7 05A9 9F17 58D7 DC92 A16D 51E1 D1F0 \
395B 1ED8 7175 D979 C9EB 7537 756E C332"
Stop the services on the server
Open FlexLM…
LMTools from start menu or from desktop
“Start/Stop/Read” Tab
The old License management software needs to be uninstalled. Add/Remove programs and uninstall it.
Once completed, the new license management software needs to be installed from the Autodesk application DVD.
Select Network install and then there should be an option to install network License Manager.
Copy the newly merged lic. file into the License folder.
Create a debug.log file and place it in the path: C:\Program Files\Autodesk Network License Manager
Configing FlexLM Services
LMTools from start menu or from desktop
Point the pathing to the files below. Use your lic file name.
Tuesday, September 7, 2010
DWG TrueConvert
ABOUT
DWG TrueView CAD file conversion software includes DWG TrueConvert™ translation software for translating any AutoCAD design application or AutoCAD-based drawing file for compatibility.
DOWNLOAD
Download the latest DWG Trueview from Autodesk’s website:
http://usa.autodesk.com/adsk/servlet/pc/index?siteID=123112&id=9078813
And install the software. Once installed, open the application…
CONVERTING DWGS
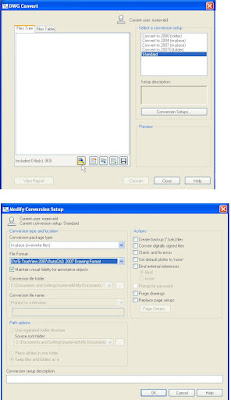
1. Open DWG TrueView 2010
2. Select the TrueView button from the upper left corner
3. DWG Convert dialog box will open. Pick the “Add File” button to add dwgs to the list.
4. Once file(s) are added select the button. And then “Modify”
5. The Modify Conversion setup dialog will allow you to pick the choices for saving your files to earlier versions and additional settings.
6. Once the changes have been made, select “OK” and then “Close”
7. Select “Convert” button to make the changes/conversions. Note: that the default setting is to convert the selected files in place.
8. So it wont look like anything has happened. But it has. You can verify this by clicking the “View Report” button in the lower left corner.
9. Done!
Friday, September 3, 2010
3ds Max - Panorama
The question came up the other day on how to make a panorama in 3ds Max. Here is the quick down and dirty.
1. Rendering dropdown Panorama Exporter
2. Command Panel
3. Select Rendering options
4. Once rendering is complete, use “Viewer…” button in the Panorama Exporter located in the Command Panel to view the Panorama. Hold down the left button to rotate the camera around the panorama
5. Export the Panorama… File Export. Choose from Cylinder, Sphere or QuickTime for file format. Note: full version of QuickTime is required.
Thursday, September 2, 2010
Acad Mac
I had mentioend Acad for Mac the other day, but it struck me to be so interesting, I haveto talk about it again. It even sounds odd to say AutoCAD and Mac together. Lets hope they are developing other apps. for Mac like Revit. Other Autodesk apps like 3ds Max Design will run under Mac's Boot Camp. So atleast that is a step in the right direction.
Here is anAutodesk link to AutoCAD for Mac: http://usa.autodesk.com/adsk/servlet/pc/index?id=15421056&siteID=123112
Wednesday, September 1, 2010
QTO - Quantity Takeoff
Quantity Takeoff or QTO for short. Is an application built on the DWF Design Review software engine, that is used to take a DWF model and apply pricing and takeoffs of a project. From Autodesk "Autodesk® Quantity Takeoff software enables the effective quantification of design data for use in estimating construction costs, enabling you to collect and synchronize design data and streamline cost-estimation processes." Here is a link to Autodesk's QTO page:
Subscribe to:
Posts (Atom)